
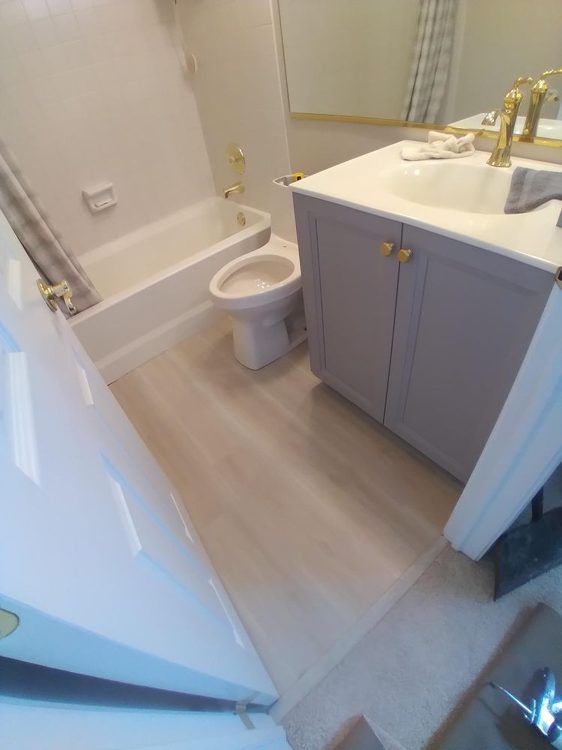
Most vinyl plank floors go down the same basic way, in straight rows with the end joints staggered. Still, the pattern you pick and how carefully the rows are planned decide whether the finished floor looks like real wood or like a grid of printed boards.
This guide covers the common vinyl plank flooring installation patterns, what manufacturers’ stagger rules say, and what to plan before the first plank goes down.
Straight Lay Is the Default for a Reason
A straight lay runs every plank parallel to one wall. It’s the fastest layout to install, it wastes the least material, and it’s the layout nearly every click-together plank is designed around.
The main decision is direction. Planks usually look best running the long way in a room or hallway, or pointing toward the main entry or the biggest window. In an open floor plan, pick one direction and carry it through so the rooms read as one floor.
Stagger Rules That Keep the Floor Looking Natural
Staggering means offsetting the short end joints from one row to the next. Every plank maker sets a minimum, and they don’t all agree. Here’s what several published installation guides say.
| Guide | Minimum End Joint Stagger | Another Rule Worth Knowing |
|---|---|---|
| Lowe’s vinyl plank guide | 6 inches | Avoid H-joints and stair-stepping |
| Lifeproof rigid core | 8 inches | Cabinets and islands go in before the floor |
| COREtec Plus | 8 inches | Discard cut-offs shorter than 8 inches |
| NuCore Performance | 8 inches | Start each row with a piece at least 12 inches long |
| Karndean rigid core | 200 mm, about 8 inches | Four corners should never meet |
| Tarkett rigid core click | 12 inches | First and last plank in a row at least 12 inches |
Treat the minimum as a floor, not a target. A good layout varies the offsets so no pattern repeats.
What H-Joints and Stair-Stepping Look Like
An H-joint shows up when end joints line up in every other row, so the seams form a repeating H shape. Stair-stepping happens when each row’s joint shifts by the same amount, which draws a diagonal line of seams across the room. The Lowe’s guide tells installers to avoid both, and Karndean’s says four corners should never meet.
Shuffle the Cartons
Vinyl planks are printed, so the same grain design shows up again and again, and shade can vary a little between boxes. COREtec, Karndean and the Lowe’s guide all say to mix planks from several open cartons so similar boards don’t land side by side.
Random Stagger vs a Set Offset
Wood-look planks almost always go in with a random stagger. A common method is to start each new row with the cut-off from the end of the last row, as long as it meets the minimum length. Floor & Decor’s NuCore how-to, for example, says to start the second row with a leftover piece at least 12 inches long.
Tile-look vinyl is different. Karndean’s guide lays tiles in a brick pattern with a half or one-third offset, and COREtec’s offsets tiles by a half piece. A set offset looks intentional with stone and tile visuals, where a random one can look sloppy.
Herringbone and Chevron Vinyl
Herringbone sets short rectangular planks in a zigzag, with the end of each plank butting into the side of its neighbor. Chevron uses planks with angled ends, so the joints meet in a clean V down the room. Both need products made for the pattern, with matched planks whose locking edges join at an angle.
Karndean’s herringbone rigid core, for example, comes as A and B planks marked on the back. The layout starts from a chalk line snapped down the center of the room, not from a wall. Floor & Decor’s NuCore line includes a herringbone plank about 4 inches wide and 24 inches long, which gives a sense of the scale.
Expect a pattern floor to cost more. This Old House’s 2026 cost guide lists herringbone among the layouts that add time and cost, and short planks with more cuts at the walls mean more waste.
Diagonal Layouts
A diagonal lay runs standard planks at a 45 degree angle to the walls. It doesn’t need a special product, and it can make a small or boxy room feel less rigid by drawing the eye across the space.
The trade-off is cutting. Every plank that meets a wall needs an angled cut, so labor and waste go up. Wayfair’s flooring measuring guide suggests about 5 percent extra material for a straight lay and at least 15 percent for a diagonal or elaborate design, and BuildDirect’s suggests 10 percent for rooms with lots of obstructions. Check your plank’s instructions too, since not every maker addresses diagonal installs.
Plan the doorways before committing. A diagonal floor that meets a straight floor in the next room needs a clean transition, and carrying a diagonal through several rooms takes careful layout up front.
Plan the Layout Before the First Row
The best pattern still fails if the rows aren’t planned. A few checks go a long way.
- Balance the first and last rows. Measure the room’s width and divide by the plank’s face width. Tarkett’s instructions say to cut down the first row if the last row would be under 2 inches, and COREtec’s call for a last row at least one-third of a plank wide.
- Check the walls for square. Snapping a straight starting line keeps a crooked wall from pulling the whole floor out of line.
- Leave the expansion gap. Gaps vary by product, from 3/16 inch in Karndean’s guide to 1/4 inch for Lifeproof and COREtec and 1/2 inch for NuCore Performance.
- Check flatness. Karndean and NuCore Performance allow no more than 3/16 inch of variation over 10 feet, and the Lowe’s guide uses 1/8 inch over 6 feet.
- Think about long runs. Big open spaces may need expansion joints. Karndean calls for one once a run passes 50 feet, while NuCore Performance allows runs up to 100 feet.
Which Pattern Fits Which Room
| Pattern | Good Fit | Cost and Waste |
|---|---|---|
| Straight lay, random stagger | Almost any room, open floor plans | Lowest |
| Half or one-third offset | Tile-look vinyl in baths, entries and laundry rooms | Low to moderate |
| Diagonal | Small rooms and entries | Higher, at least 15 percent overage |
| Herringbone or chevron | Entries, dining rooms, feature areas | Highest, needs a special product |
If you’re comparing materials, our post on wood flooring installation patterns covers the same layouts in hardwood, and our breakdown of LVP installation cost shows how layout fits into the budget.
Quality Installs is a family-owned flooring installer in Glenview that puts in luxury vinyl plank along with hardwood and laminate. Our vinyl plank installation page covers that work, and the planning above applies to any LVP floor.