
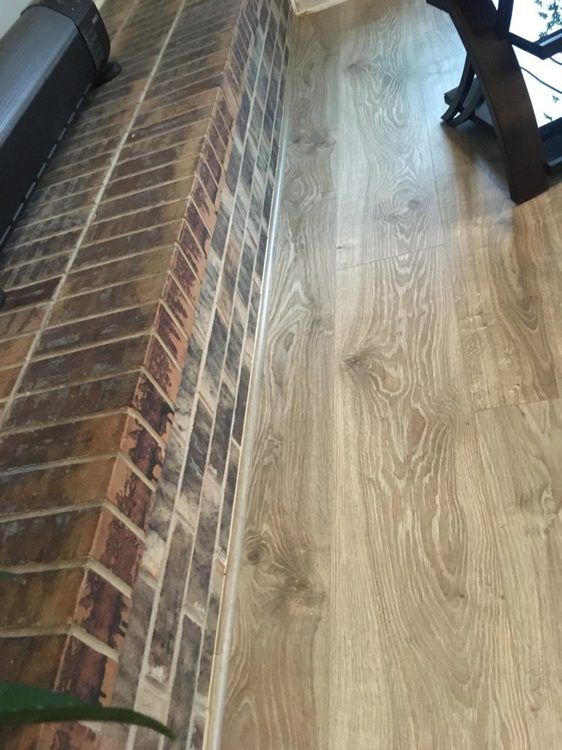
Almost every wood floor you’ll walk on is tongue and groove. The joint itself is simple. How the boards get fastened, and what has to be true before the first one goes down, decides whether the floor stays flat and tight for decades.
Here’s how the joint works, the three main ways these floors are installed and what a good installer checks first.
How Tongue and Groove Works
Each board has a tongue milled along one edge and a groove along the other. The tongue of one board slides into the groove of the next, so the boards lock into one flat, continuous surface.
Many boards are end-matched too, with a tongue and groove on the short ends, so the joints between board ends stay flush.
The joint does three jobs.
- It keeps boards aligned, so edges sit flush instead of forming little lips.
- It ties neighboring boards together, so a heel or chair leg near an edge doesn’t push one board down on its own.
- It hides the fasteners. On a nail-down floor, fasteners go in at an angle just above the tongue, where the next board covers them.
Installation usually starts along a straight line near one wall, with the groove facing the wall, and works across the room one row at a time.
Many laminate and engineered floors use a click profile instead. It’s a reshaped tongue and groove that locks together without nails or glue.
Nail-Down, Glue-Down and Floating
| Method | How It Holds | Common With | Typical Subfloor |
|---|---|---|---|
| Nail-down | Cleats or staples through the tongue into wood | Solid hardwood and some engineered | Plywood or OSB, on or above grade |
| Glue-down | Adhesive bonds boards to the subfloor | Engineered and some thin solid | Concrete or wood, including some basements for engineered |
| Floating | Boards join each other over a pad, not the subfloor | Engineered and laminate | Most flat, dry subfloors on or above grade |
Nail-Down
Nail-down is the traditional way to install solid hardwood over a wood subfloor. Mullican’s solid hardwood instructions call for 1 1/2-inch or 2-inch cleats or staples, spaced every 8 to 10 inches on narrow strip flooring and every 6 to 8 inches on wider plank, with fasteners within 2 to 3 inches of each end joint.
The subfloor matters. Those same instructions list 3/4-inch plywood as preferred and 5/8-inch as the minimum, accept 23/32-inch OSB on joists up to 19.2 inches on center, and rule out particleboard. Boards should run at right angles to the floor joists.
Nail-down isn’t for below grade. The NWFA notes that solid wood flooring belongs on or above ground level.
Glue-Down
Glue-down bonds the boards straight to the subfloor, which makes it the usual route over concrete. Hallmark’s engineered flooring instructions allow glue on concrete that’s on or above grade, and in basements only with a vapor abatement system under it.
Concrete has to be dry first. Hallmark calls for at least 60 days of drying time on new slabs and sets limits for standard moisture tests before any flooring goes down.
Some solid installs use adhesive too. Mullican describes an optional method that adds a serpentine bead of urethane adhesive to the subfloor along with the usual fasteners.
Floating
A floating floor isn’t attached to the subfloor at all. The boards connect to each other and rest on an underlayment, so the whole floor moves as one piece.
For tongue and groove engineered floors, Hallmark calls for glue in the groove, a firm underlayment pad with a built-in moisture membrane and open expansion space in all directions. That’s why a floating floor generally shouldn’t be pinned under heavy cabinets or a kitchen island.
If you’re weighing a floating laminate against real wood, our post on laminate vs hardwood compares the two.
What Installers Check Before the First Board
Good installs are decided before any flooring comes out of the box. Manufacturer instructions differ in the details, but they cover the same ground.
- The room is ready. The building is closed in, wet work like drywall mud is dry, and the heat or air is running. One set of Bruce solid flooring instructions calls for 60 to 80 degrees and 30 to 50 percent humidity for 14 days before and during installation.
- Moisture readings. Wood subfloors need to read no higher than 12 to 14 percent, depending on the manufacturer, and the flooring has to be close to the subfloor. Mullican allows a 4 percent difference for strip and 2 percent for plank, and Bruce suggests checking about 40 boards per 1,000 square feet.
- Flatness. Bruce and Hallmark both call for a subfloor within 3/16 inch over 10 feet, or 1/8 inch over 6 feet.
- Subfloor strength. Plywood or OSB of the right thickness, fastened well, with no soft spots.
- Board direction. Usually perpendicular to the joists, unless the subfloor has been reinforced.
- Expansion space. Solid floors typically get about 3/4 inch at the walls, and Hallmark’s engineered floors need at least 1/2 inch. Baseboard and shoe molding hide the gap.
- End joint stagger. Bruce and Mullican both call for at least 6 inches between end joints in neighboring rows.
- Acclimation by the numbers. Bruce’s instructions say to acclimate the flooring as needed to meet the moisture requirements, which makes it a reading to hit rather than a set number of days.
Why the Details Matter
Wood swells in humid months and shrinks in dry ones. The tongue and groove joint keeps boards aligned through that movement, and the expansion gap gives the floor room to grow.
Skip the moisture check or the gap, and the floor has nowhere to go. That’s when you see cupped boards in summer or wide gaps in winter.
Once the floor is in, steady humidity does the rest. In Chicago-area homes, that means watching the furnace season closely, since the NWFA recommends 30 to 50 percent humidity year-round.
Quality Installs is a family-owned team of flooring installers in Glenview. Every installer is licensed, bonded and insured, and the company carries the maximum general liability and workers’ compensation coverage. You can read more about our hardwood flooring installation work.
Layout changes the job too. Our guide to wood flooring installation patterns covers how straight, diagonal and herringbone floors compare.